I like it automatic
Preparing this website gave me the opportunity to play with new toys. The main reason is that I stupidly decided that ready-to-use themes were not good enough for me so I had to create my own. And ensues yet another dive in the marvellous horrendous world of web design. I actually learnt that css changed a lot, and for the good, but it’s not what I want to focus on today. Rather, I want to share why and how I started to use Travis CI. Read on.
So it all started once I had a good enough theme to show to the world. Pelican themes are basically a set of html templates and one or more associated css files. The css I produced uses the (relatively) recent flexbox [1] syntax, and to ensure a correct rendering on older browsers, I opted to use the excellent autoprefixer module. For good measure, I also wanted to minify the stylesheet after that. All this means that the source version of the stylesheet had better be built before actual use.
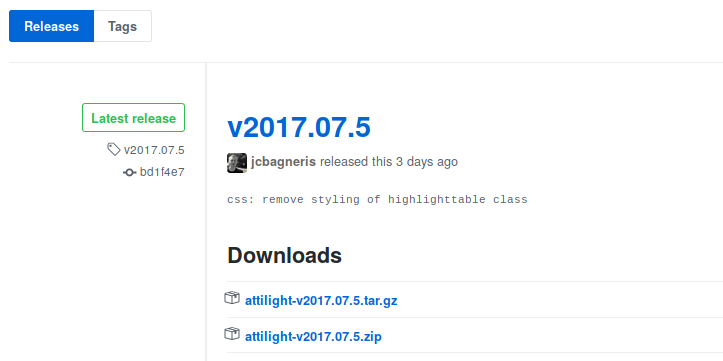
GitHub actually provides automatic releases for source repositories whenever you tag a commit (associate a version number to it). These releases default to be simply a .zip or .tar.gz of the repository, providing a convenient way for people to download the source if they don’t want to mess with git and versioning.

A source release on GitHub
You can also manually associate a file to a release, allowing you to build whatever you want to propose e.g. a binary package or a tarball. But of course, I don’t want to do it manually, I want the computer to do it for me. Automate everything!
Enters Travis CI. It is a continuous integration service which you can associate to your GitHub repositories, for free if those are public. The idea is rather simple: if a repository is associated to Travis CI, whenever you push a new commit to it, Travis CI will do whatever is described in the repository .travis.yml file if this one exists. The system is widely used for automatic testing of code, but can also deploy or upload to a list of providers, including the major cloud players, the Python Package Index and, you guessed it, GitHub releases.
As the documentation about GitHub releases uploading is — at least for me — rather short, I thought I might share here what I did exactly to finally succeed.
I did it!
Setup
If you never used Travis CI before, I suggest you create a sandbox repository on GitHub, sign in to Travis CI, and get started with it. Actually, I did all of my experimentations on such a repository before switching to the real one. If you were curious enough to follow the link and look at the commits, you realize now that it was a lot of trial and error. I can be a bit dumb when the temperature rises above 35 degrees (centigrades).
So, the GitHub releases uploading documentation on Travis CI says you should add the following to your .travis.yml:
deploy:
    provider: releases
    api_key: "GITHUB OAUTH TOKEN"
    file: "FILE TO UPLOAD"
    skip_cleanup: true
    on:
        tags: true
But actually, don’t. Do not add anything to your .travis.yml (yet). The problem is that you have to manage the authentication first, and the easiest way to do it is to use the Travis CI command line client, which will write the above template for us, and complain if it exists already. Thus:
- Install the command line client, following the link above
- cd to your repository
- travis login to log in to travis (see the documentation)
- travis setup releases will setup an encrypted api key for you, this is what you want and why you need the command line client. When asked about the file to upload, you can answer anything at that time, it will simply be a placeholder in the .travis.yml file.
Once you did the four steps above, you have a correct basis and can start to add the preparation of your release files to the .travis.yml file.
Build the release files
Your .travis.yml file should now have a section looking like the one below:
deploy:
    provider: releases
    api_key:
        secure: [redacted]
    file: "FILE TO UPLOAD"
    skip_cleanup: true
    on:
        repo: yourname/therepo
Make sure that the skip_cleanup: true directive is indeed present if you need to include some results of the building process in the release. And we sure need it, as the point of all this is to prepare a built release, not only a source one.
Now let’s add the build steps to the file. In my case, autoprefixer is a node.js package installable with npm. So we first make sure that Travis CI installs the dependencies (this part should go at the very beginning of the file):
language: node_js
node_js: node
before_script:
- npm install -g postcss-cli autoprefixer cssnano
Next comes the build step itself. Here, we want to use autoprefixer and then a minifier on the various stylesheets, so we add under the before-script directive:
script:
- postcss --use autoprefixer cssnano -d build static/css/*.css
Which means that after this step, the built stylesheets should be available in the build directory on Travis CI. We can now prepare the final release file: we copy everything we want to include in it in a destination directory. To make things a bit cleaner, we start by storing the destination directory name in a RELEASE_NAME variable and exporting it. This part goes before the before-script directive:
env:
  global:
    - RELEASE_NAME=foobar
To prepare the release, we create the necessary steps under a before-deploy directive. First we delete (if necessary) and re-create the build directory. Next we can copy the needed files: here I simply copy the LICENCE file, the contents of the static directory, and replace the source stylesheets by the built ones. Finally, we build a zip and a tar.gz compressed files with the RELEASE_NAME directory:
before_deploy:
- rm -rf $RELEASE_NAME || exit 0
- mkdir $RELEASE_NAME
- cp LICENSE $RELEASE_NAME/
- cp -a ./static $RELEASE_NAME/
- cp -f build/*css $RELEASE_NAME/static/css/
- tar -czf $RELEASE_NAME-$TRAVIS_TAG.tar.gz $RELEASE_NAME
- zip -r $RELEASE_NAME-$TRAVIS_TAG.zip $RELEASE_NAME
Note that the release files are tagged with the commit tag (the version) which will be passed to Travis CI when we push the commit. Also notice that the zip and tar binaries are available in the Travis CI building environment: we don’t have to install those ourselves.
A final note: you probably noticed that the basis .travis.yml file produced by the Travis CI command line client would deploy on repo: yourname/therepo instead of tags: true. You should change this to the latter if you only want to deploy a new built release on tagged commits (and use the $TRAVIS_TAG variable).
Have fun, and remember to automate everything!
Footnotes
| [1] | Yes, I know, grid is even better. It’s coming soon here :) |